
From Plant to Plate: Cultivating Your Organic Garlic
We started our journey in the Fall of 2019 with a passion for organic farming and a love of garlic. Each year we learn or experience something new as we work hard to deliver the best quality garlic possible to your table.
We've talked with other garlic farmers and find that we all grow garlic the same way with various nuances. Like all things farming, you have to do what works best for your growing conditions, abilities, and your pocket book. We've found that we're in a middle ground of more than a backyard, but less than a corporate farm. While this can be more challenging in many ways, we find that it calls on our creativity and perseverance to make it work.
We're excited to share our process with you and welcome you to our farm!

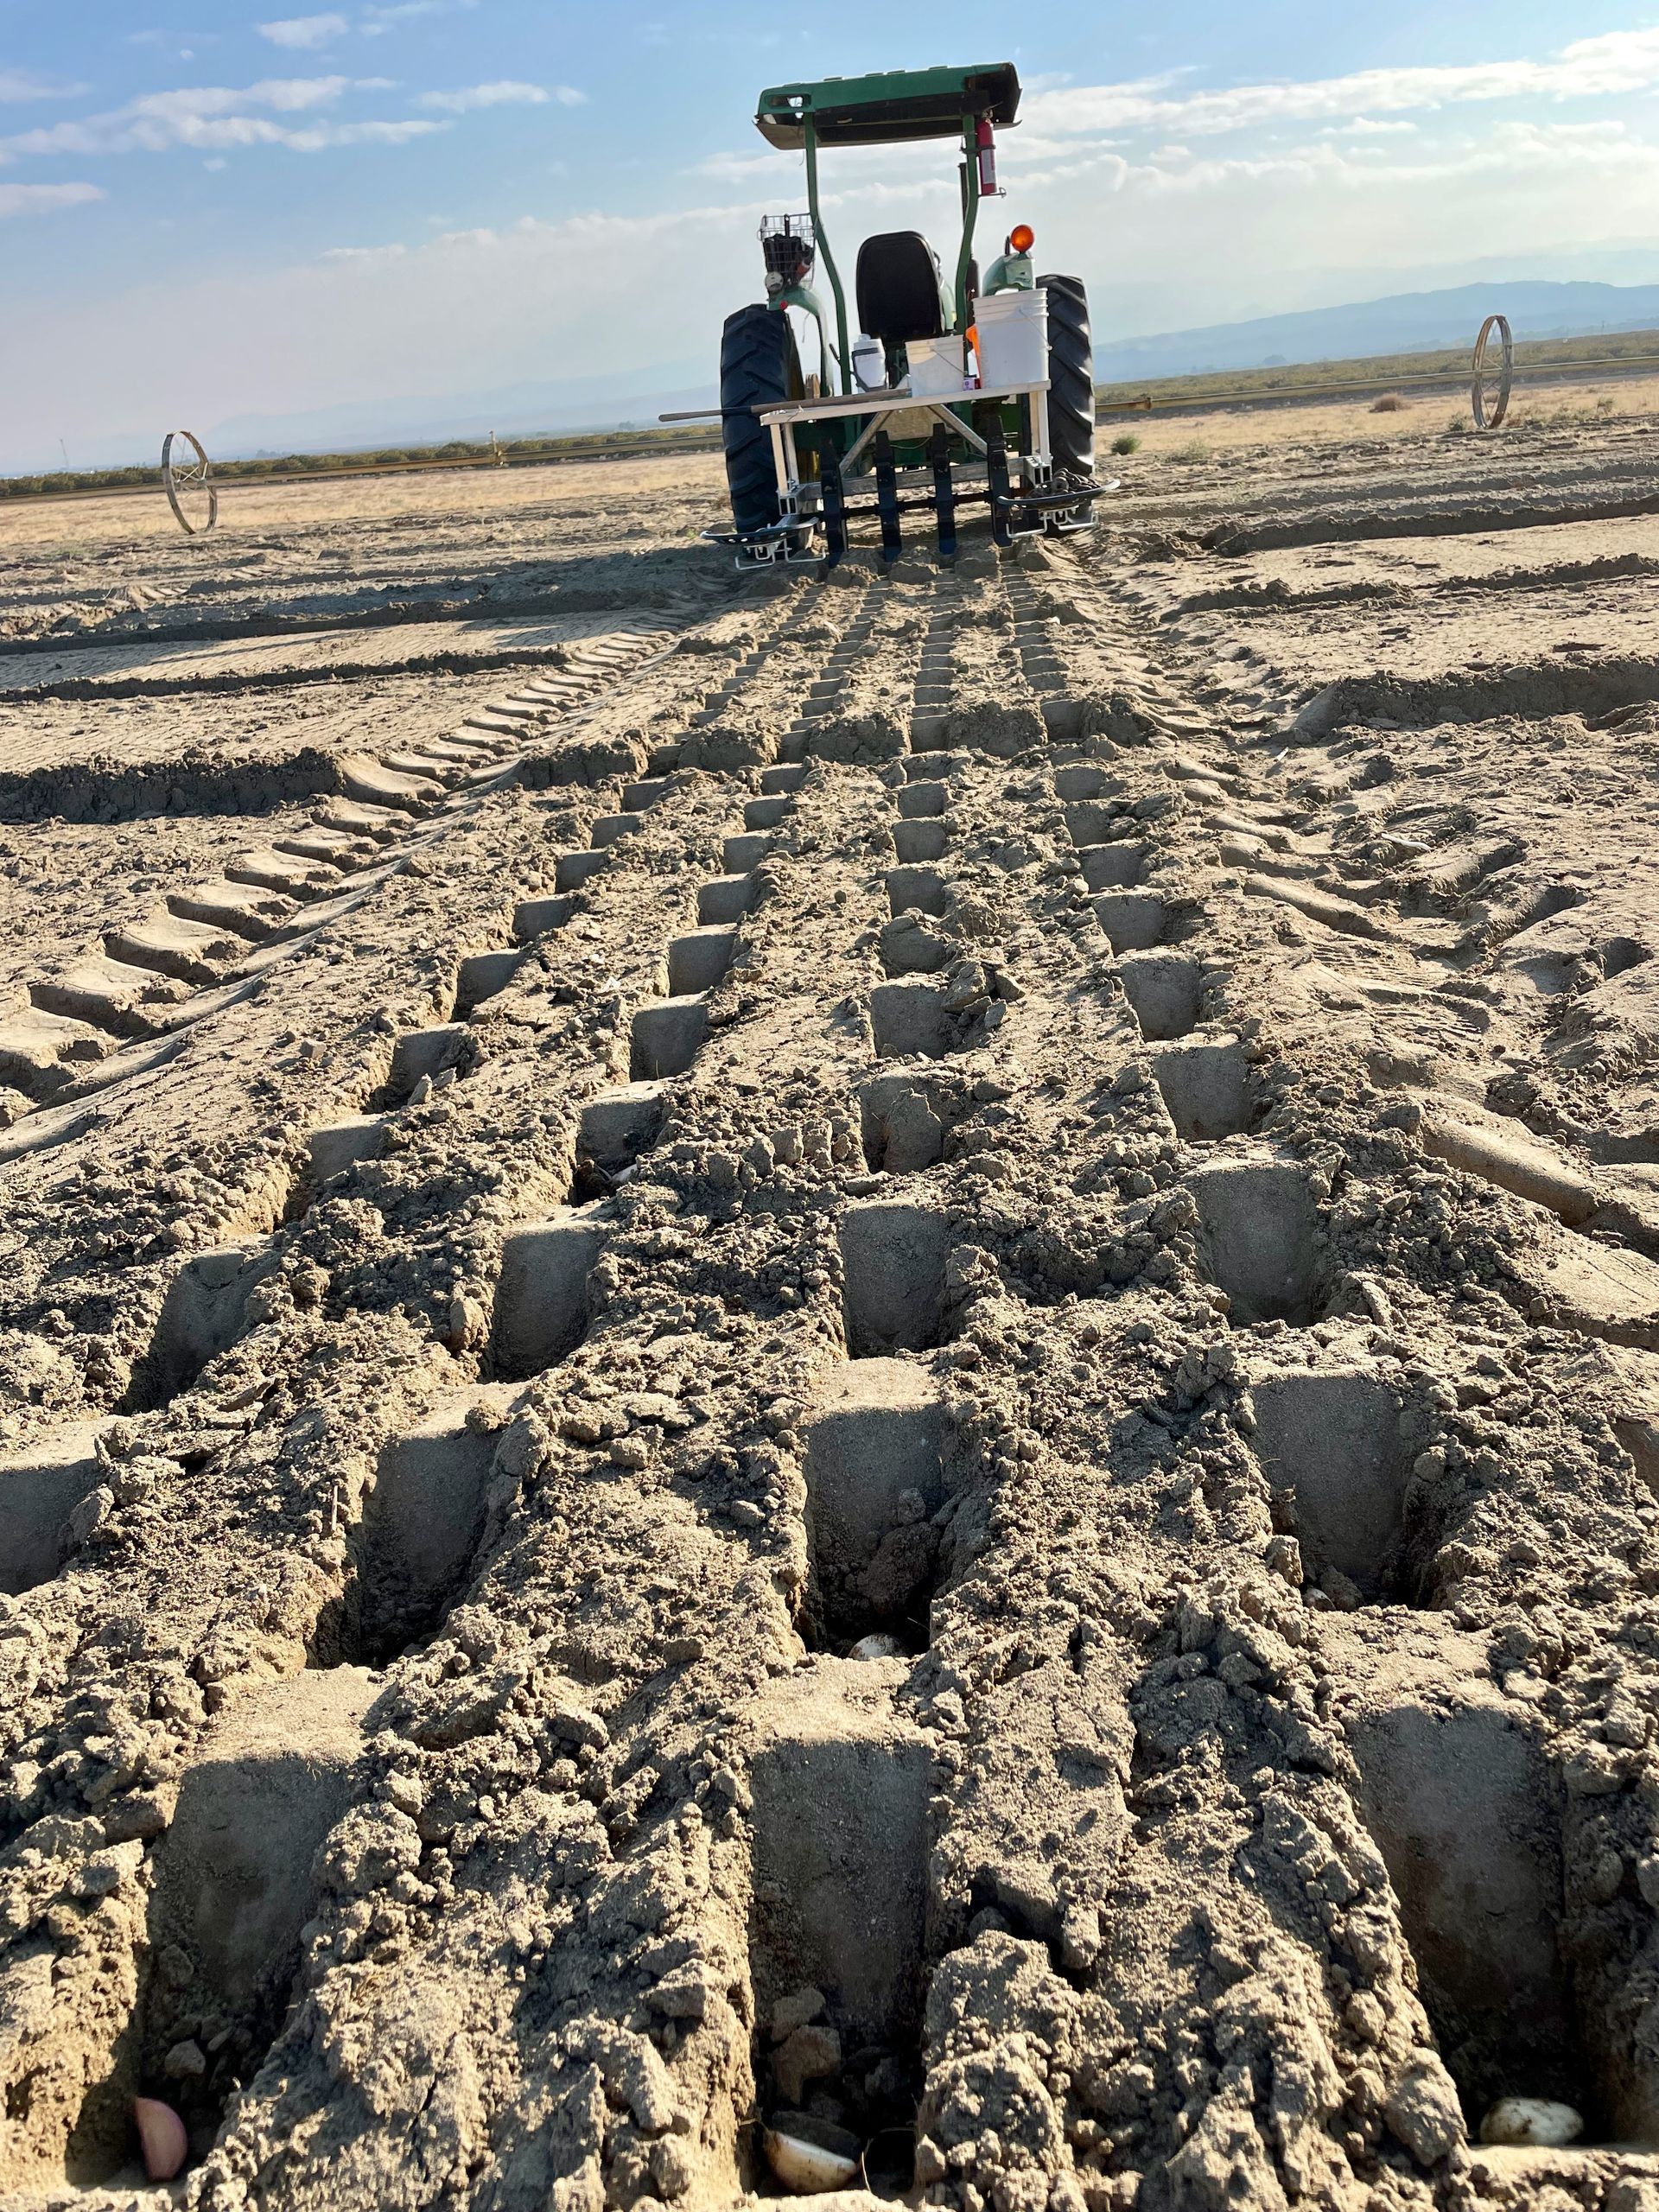
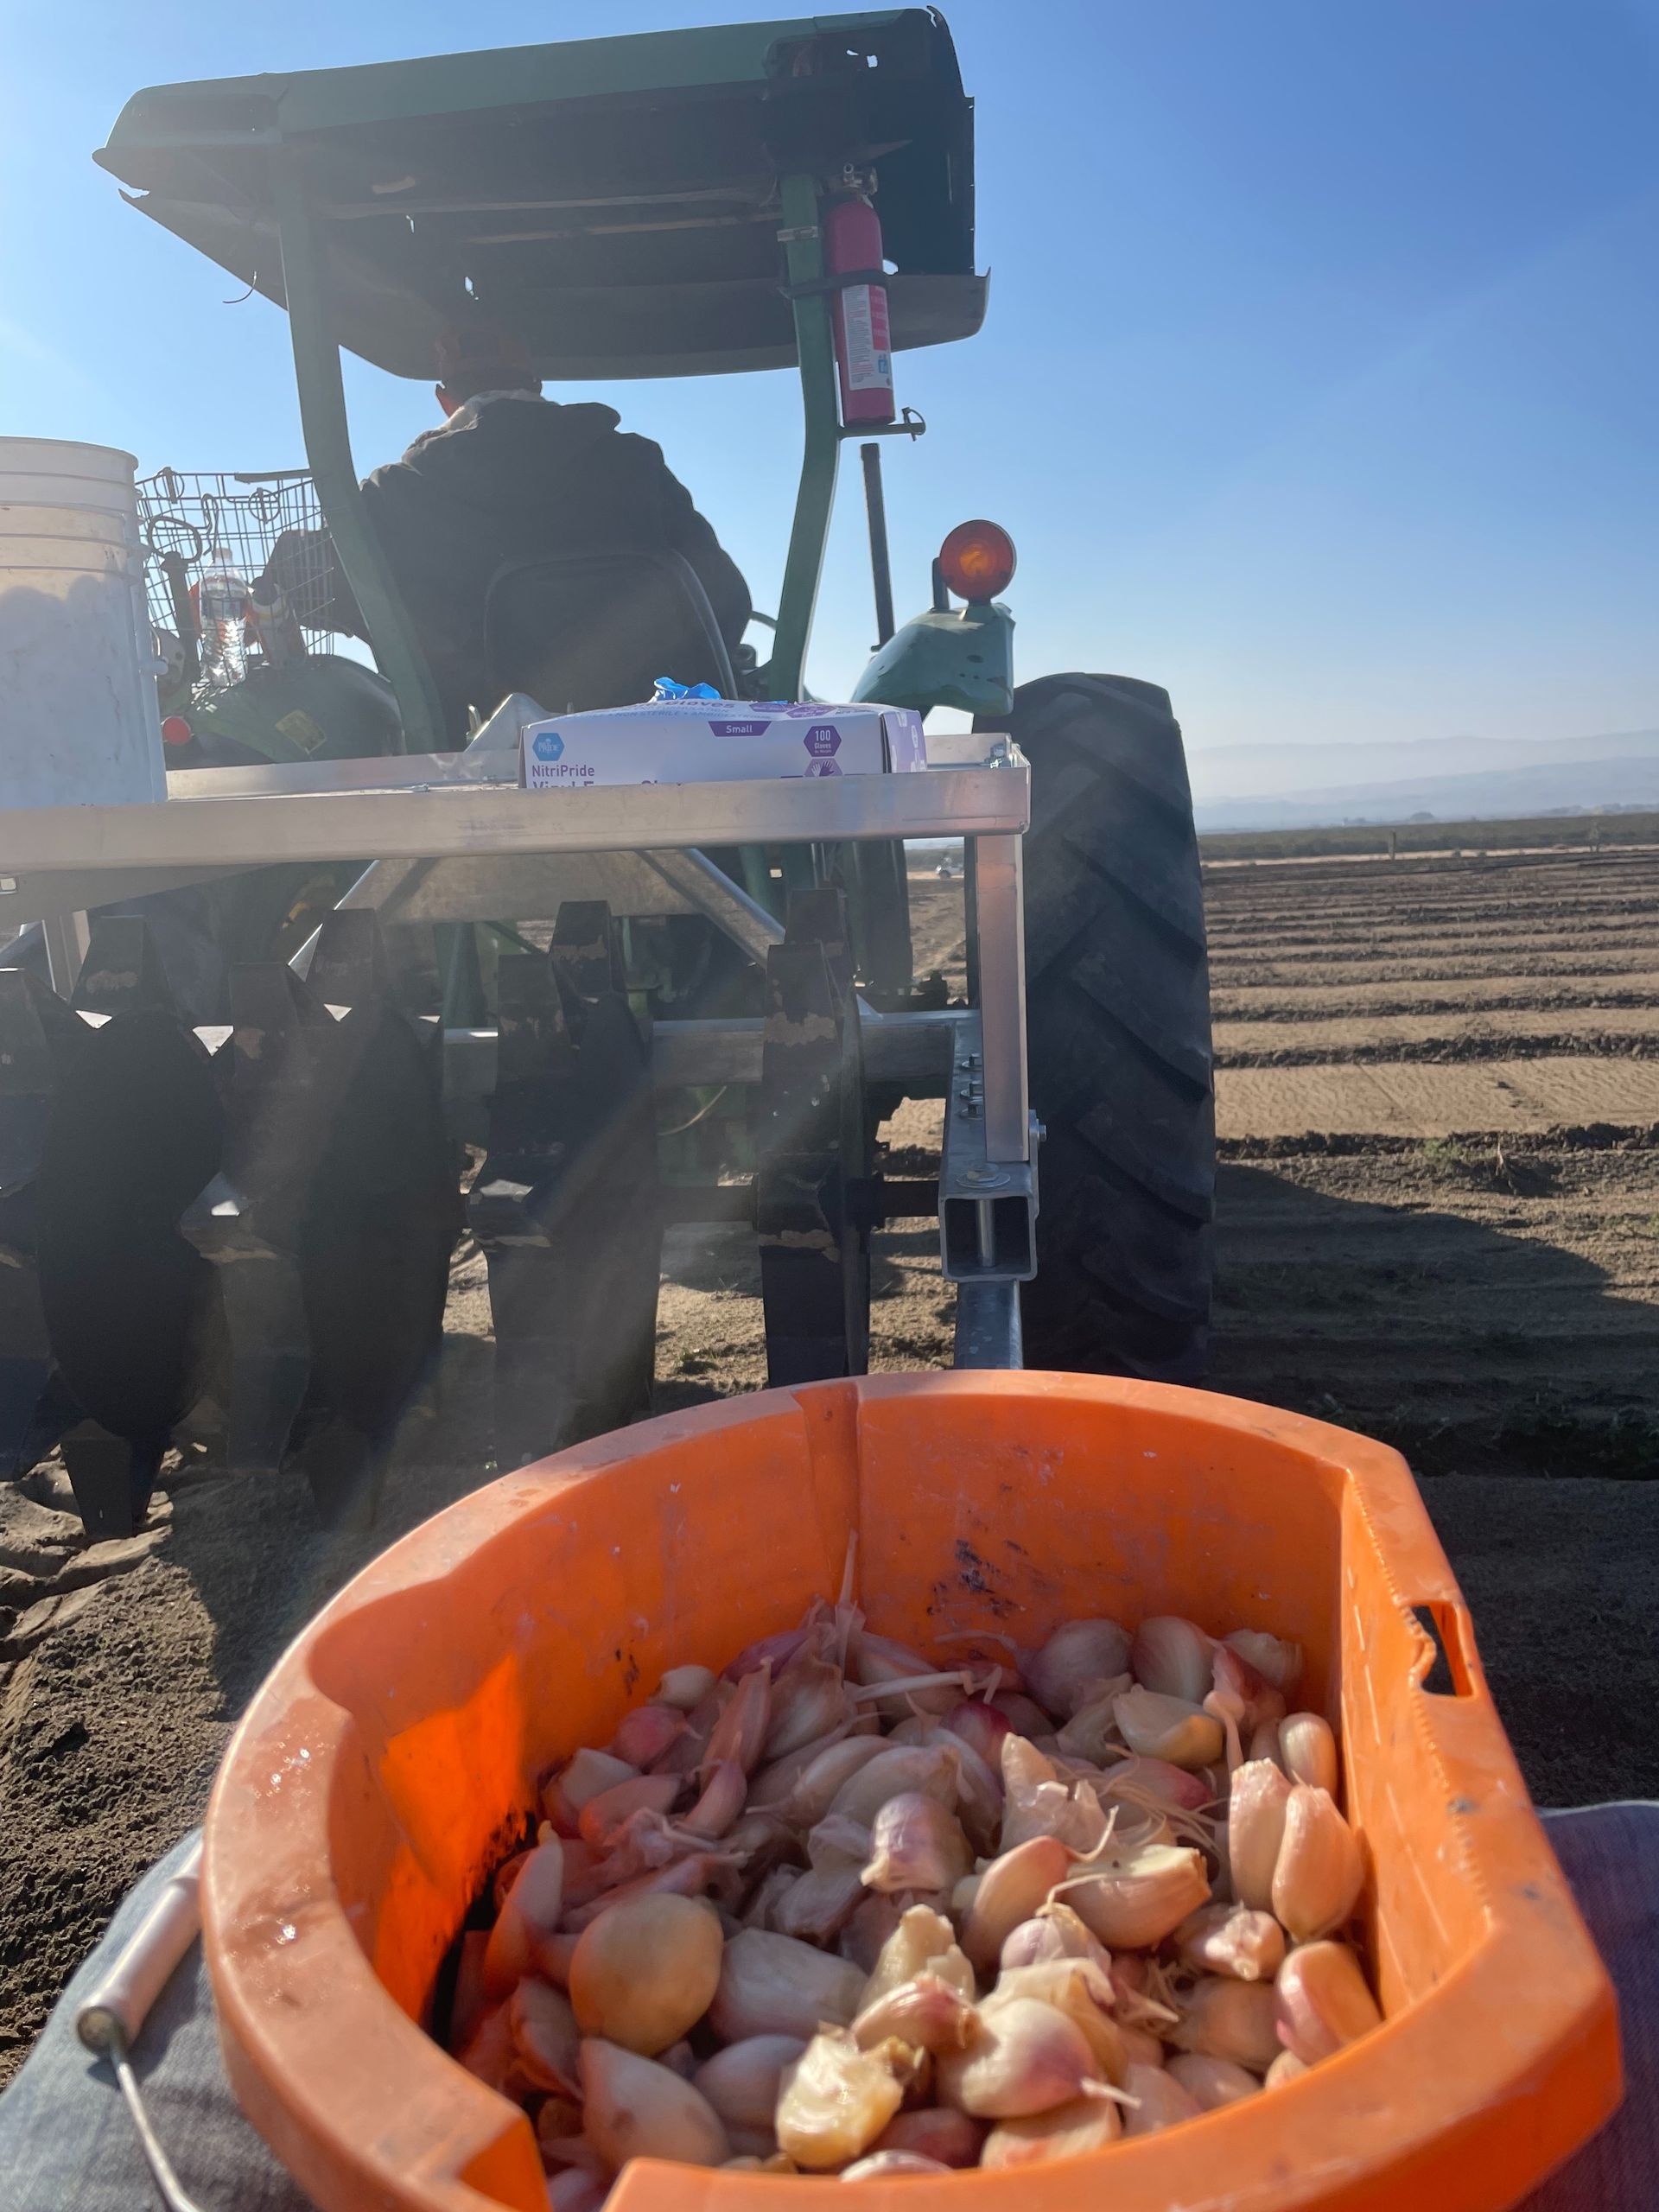
Planting has morphed quite a bit over the years. From digging holes by hand and spending hours in the dirt to purchasing a planting implement hand made in Canada. There aren't a lot of small farm implements available for garlic farming so we were excited to find it.
The Planter has an attachment that puts the holes in the ground and then the "planters" (us and any family members we can get to help!) sit on seats with buckets of seed and lay them in the holes while moving. It's quite a ride and the planters have to hustle to keep up not only with the tractor but with each other.
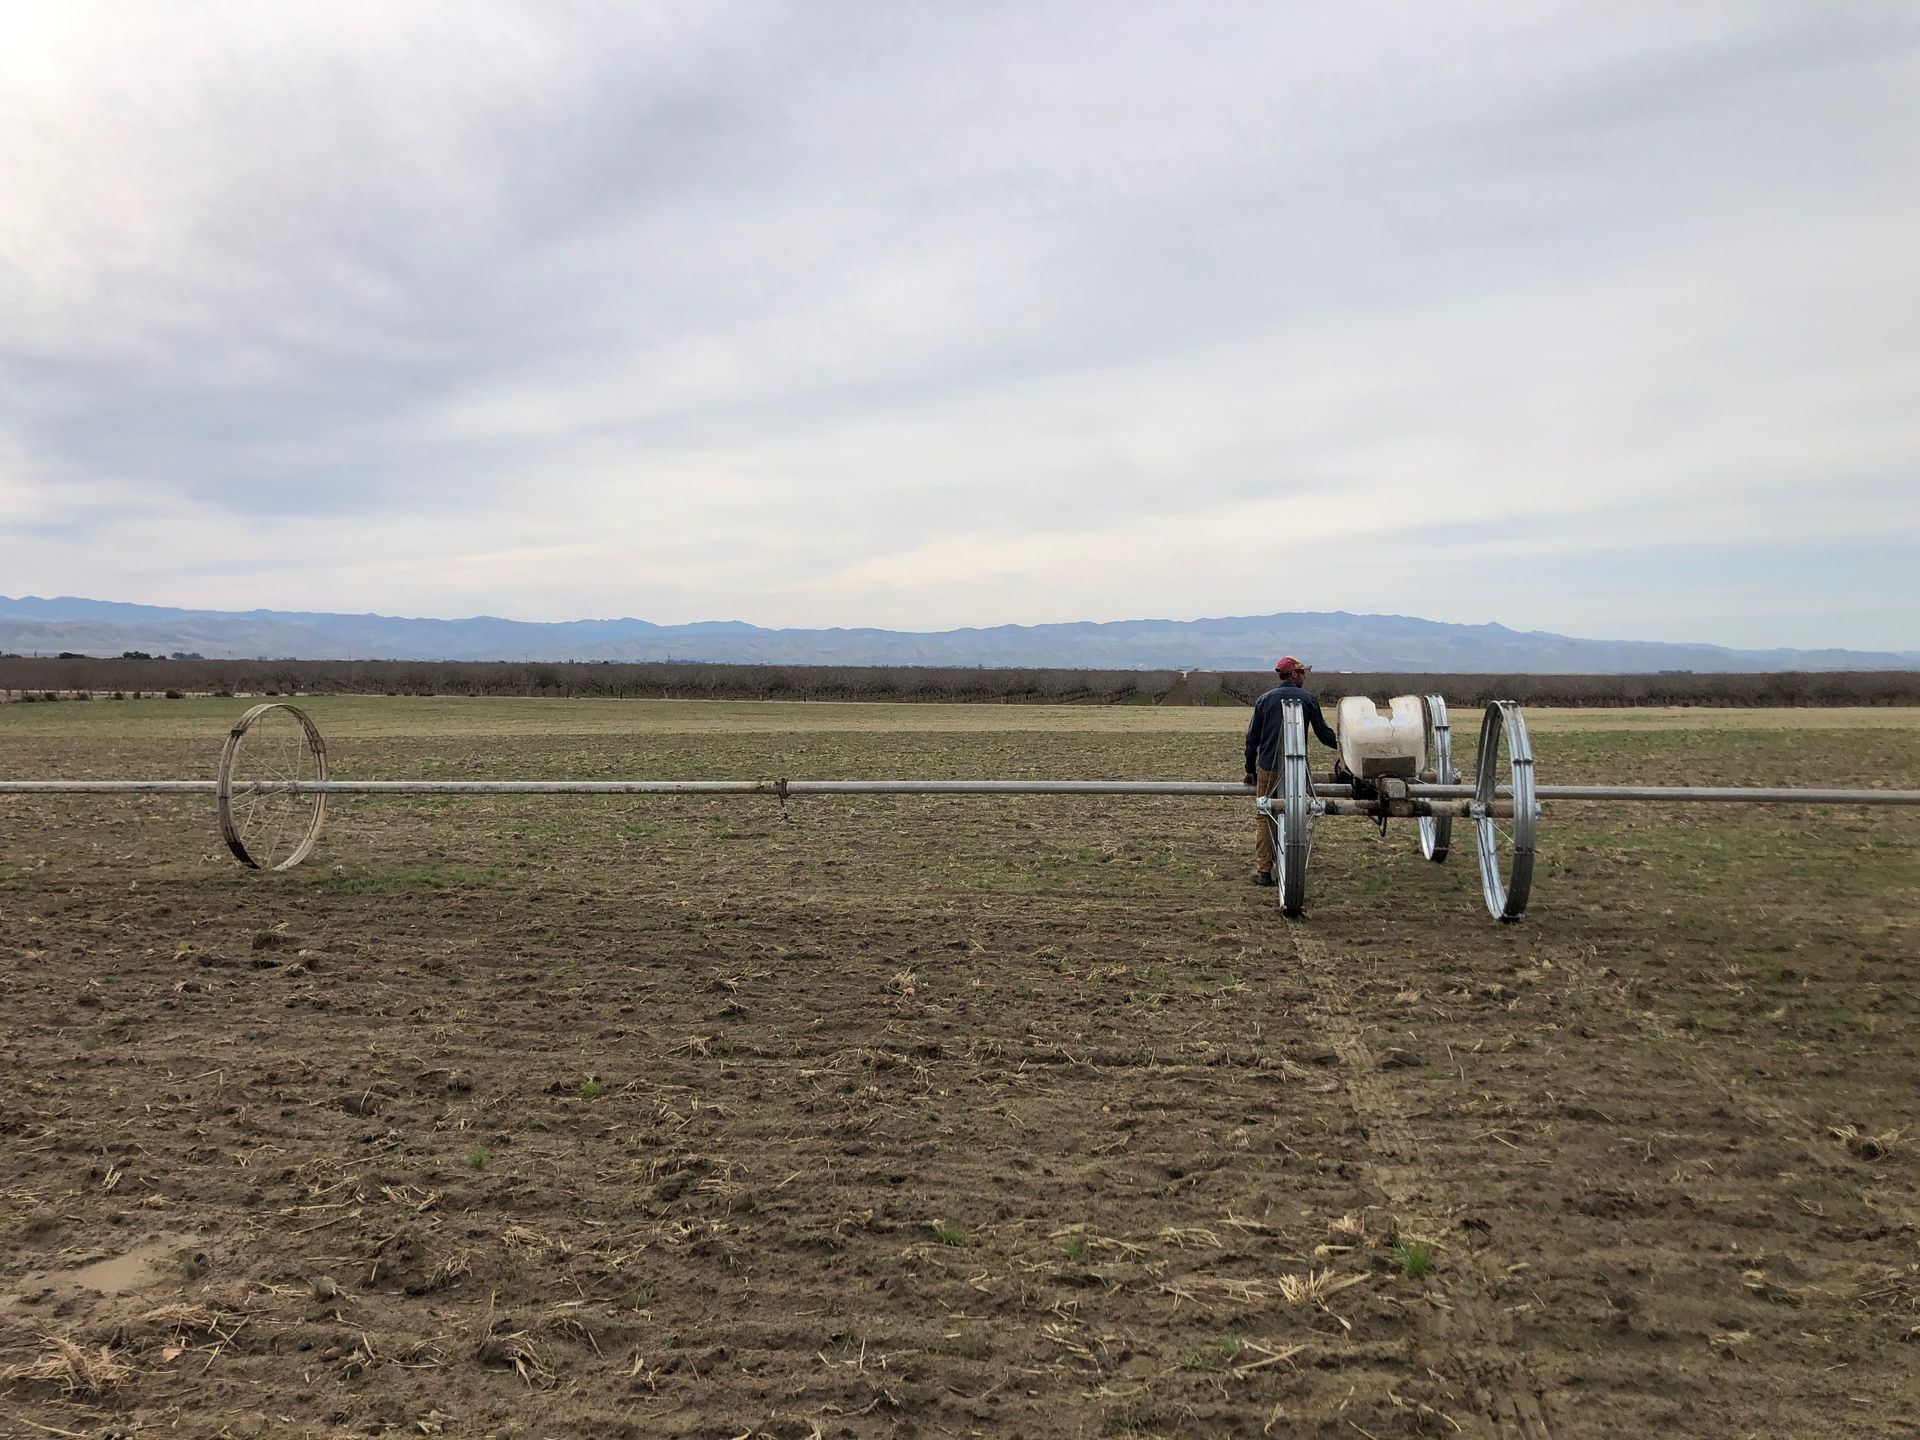
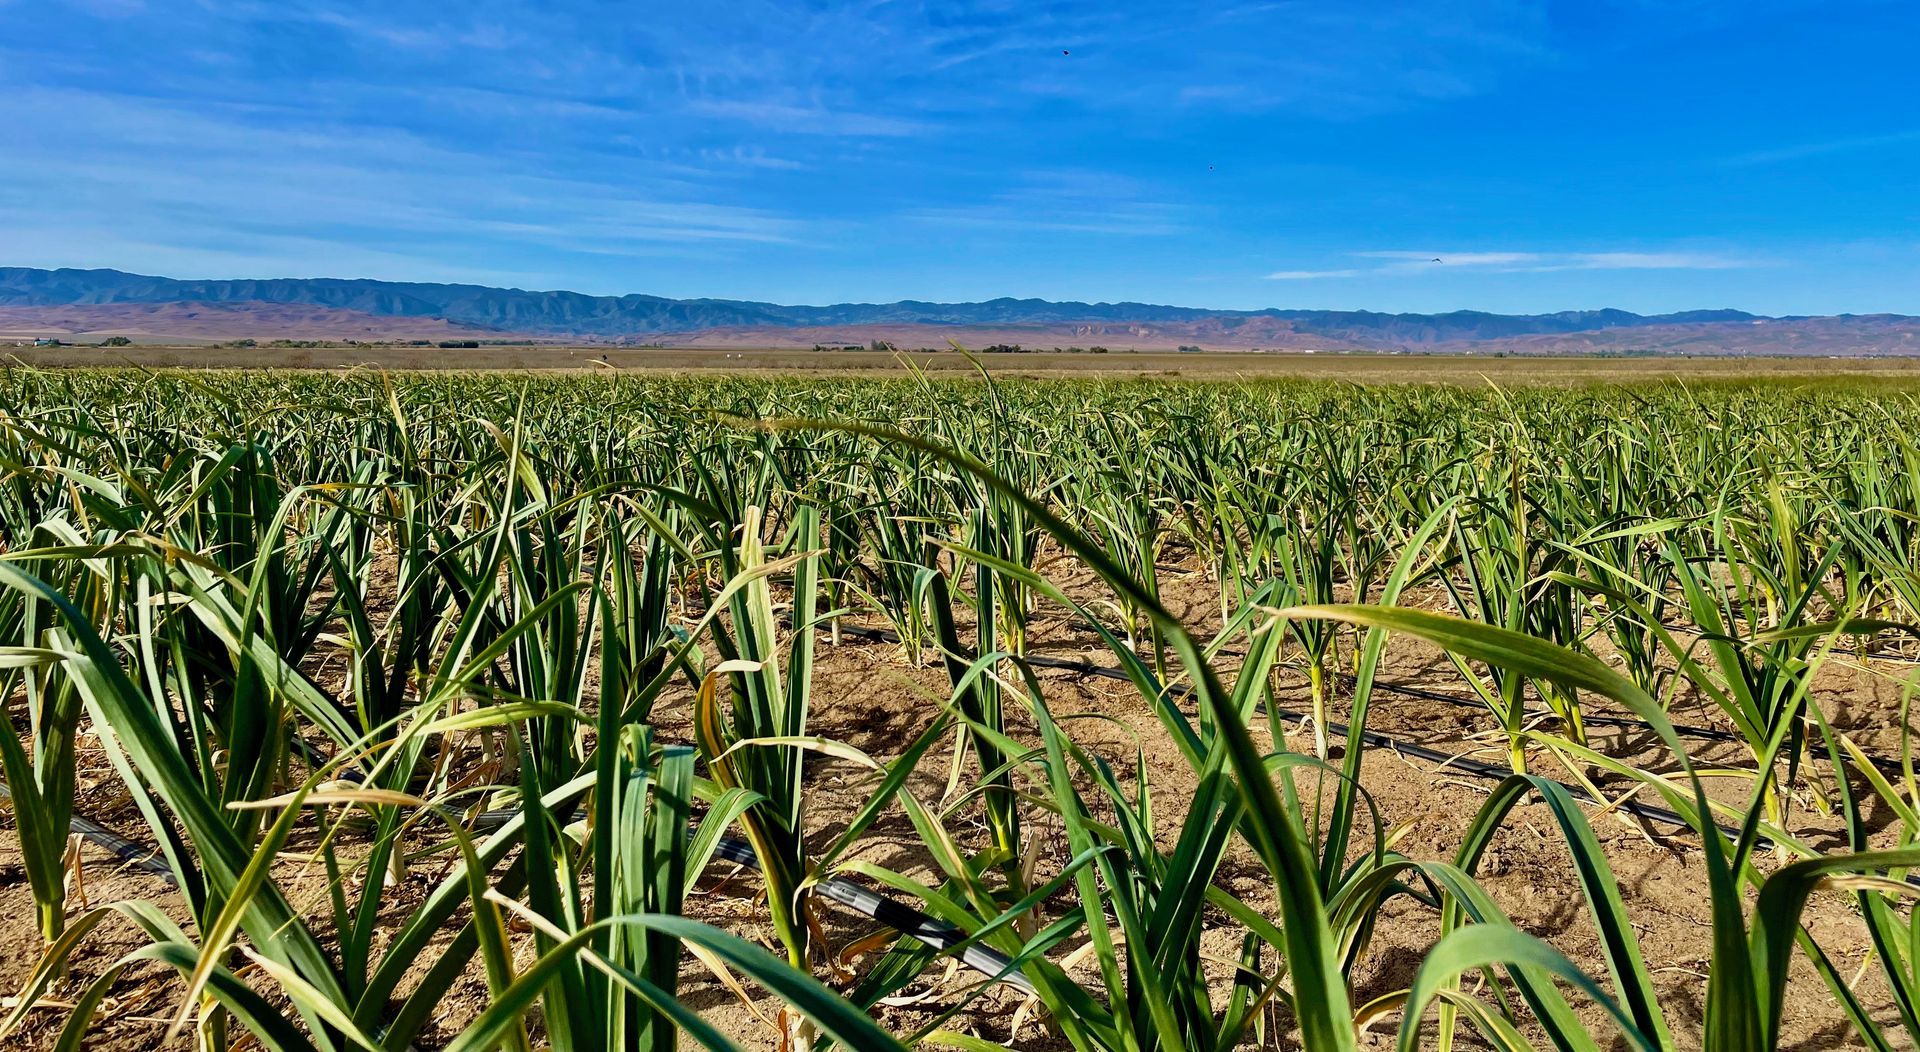
We use multiple methods of irrigation for different purposes - a wheel line or sprinkler system for use from field preparation through planting. Then we install drip irrigation after the garlic sprouts up until a few weeks before harvest.
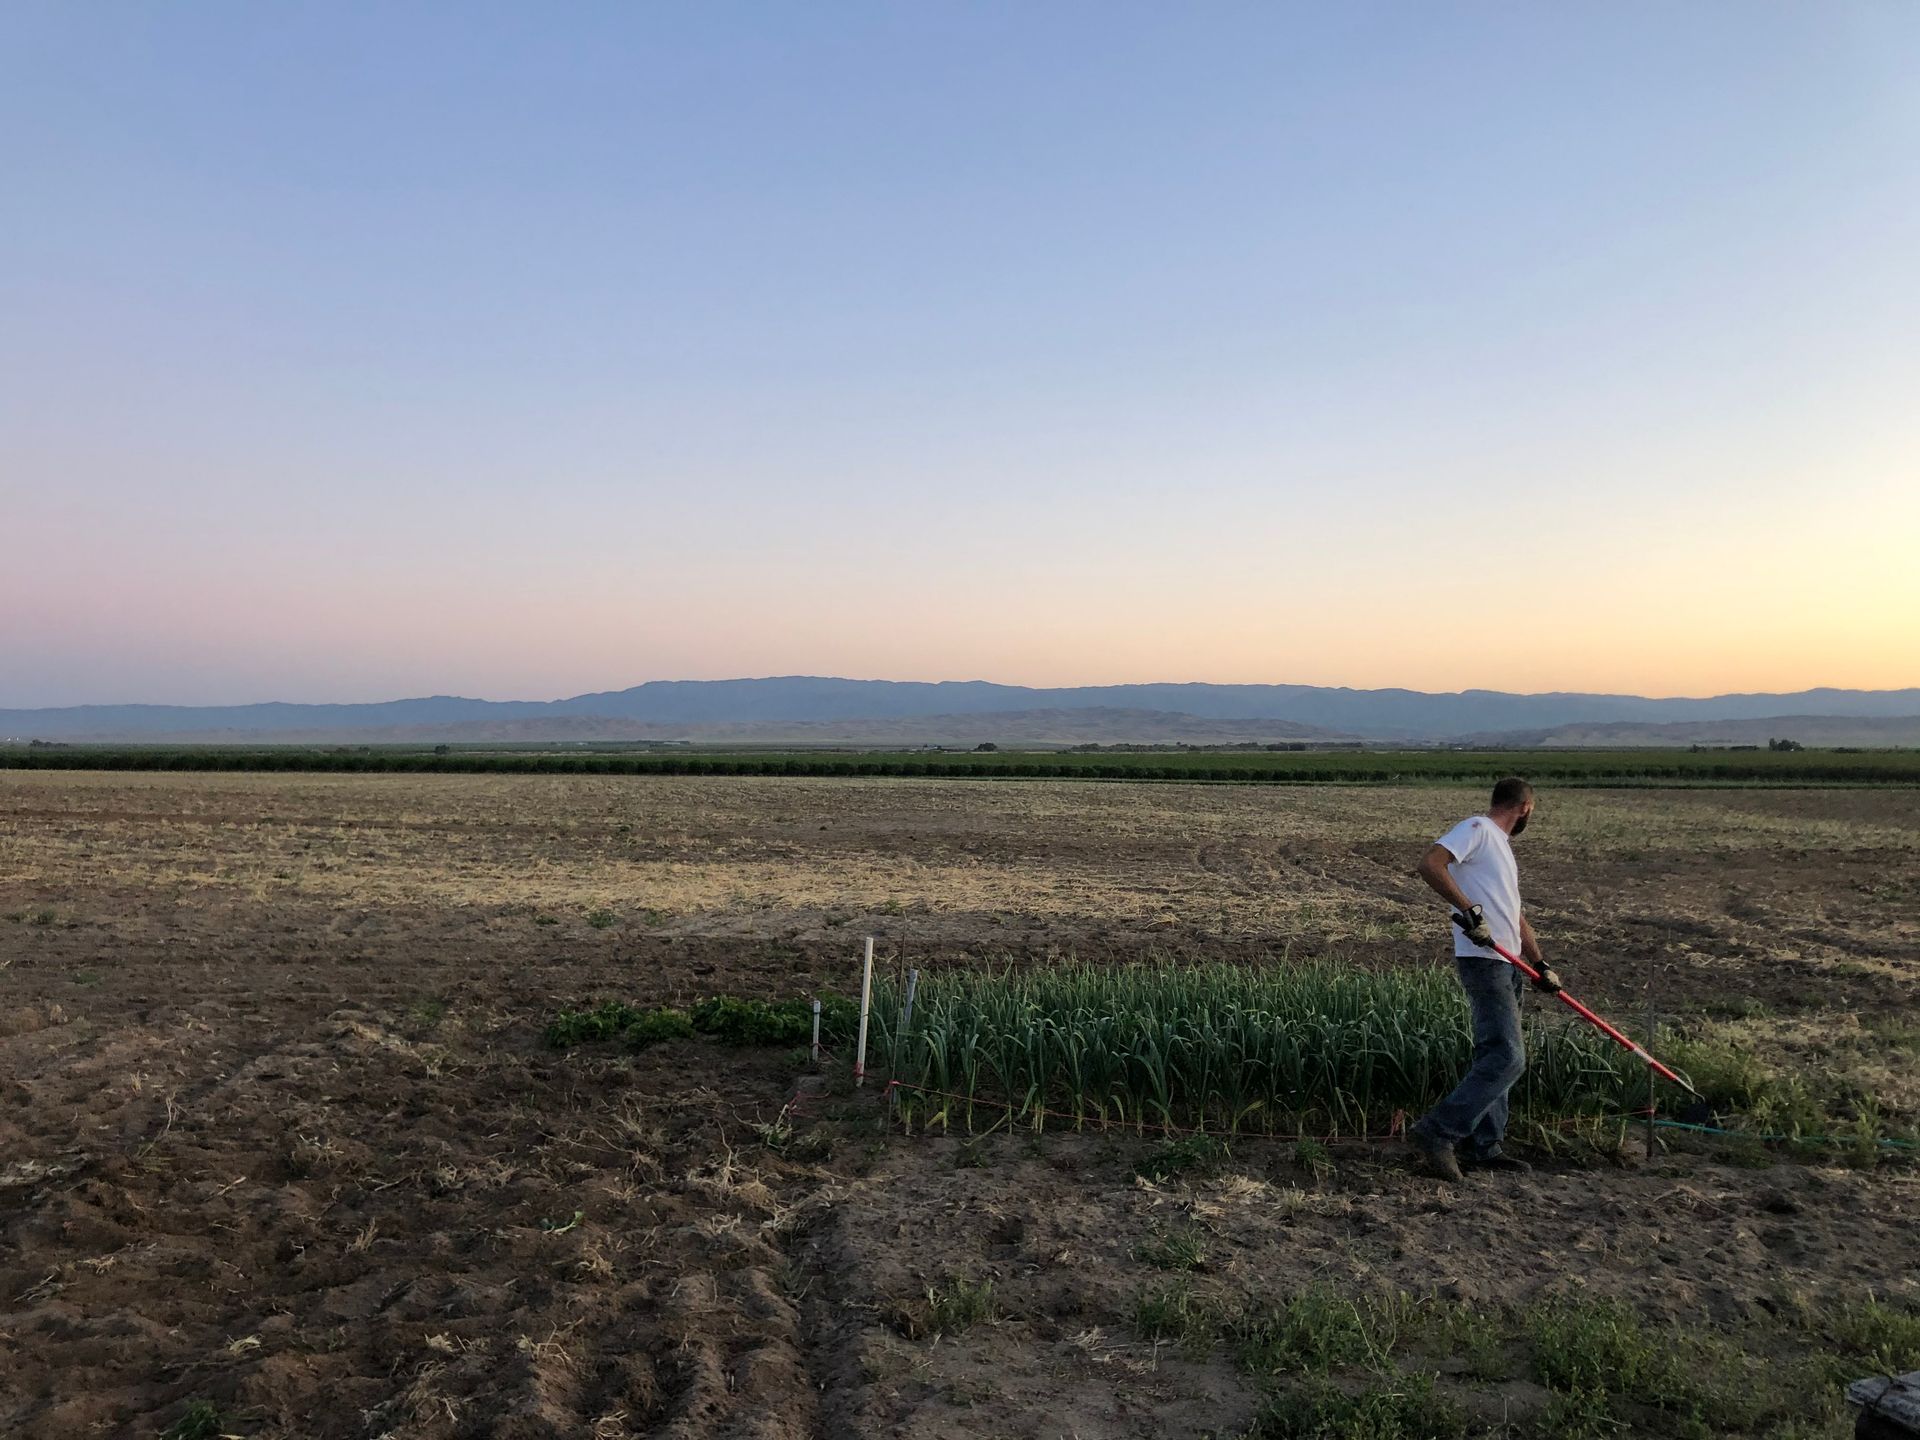
As an organic farm we always have to consider weeds. We can tell you that hand weeding acres of land throughout the growing season is a full time job! Now, after years of diligence, the fields are in great shape and weeding can be handled with intermittent tilling.
What is a Wheel Line?
A wheel line is attached to the water tank (fed from the well) through a long hose. Once the water reaches the line it irrigates from sprinkler heads that are spaced out along the lateral pipe. To move the wheel line, we start up the gas powered engine (seen in the photo above) and it "walks" the whole line either up or back.
Our drip irrigation system is also fed by our well and set up to run organic fertilizer through the lines, delivering food directly to our garlic, giving it a boost as it grows.

From planting until harvest, every day is spent in the field monitoring the growth and health of each plant and then tightening up watering schedules.
Then comes HARVEST! Hardneck garlic grows a scape which is a long green stem with a flower bud on the end. As soon as they appear we know harvest isn't too far out. All scapes get removed so that the plant's energy goes to the bulb, not the flower.
When the leaves start to die back, we stop irrigating and start the curing process in the ground to prevent rot.
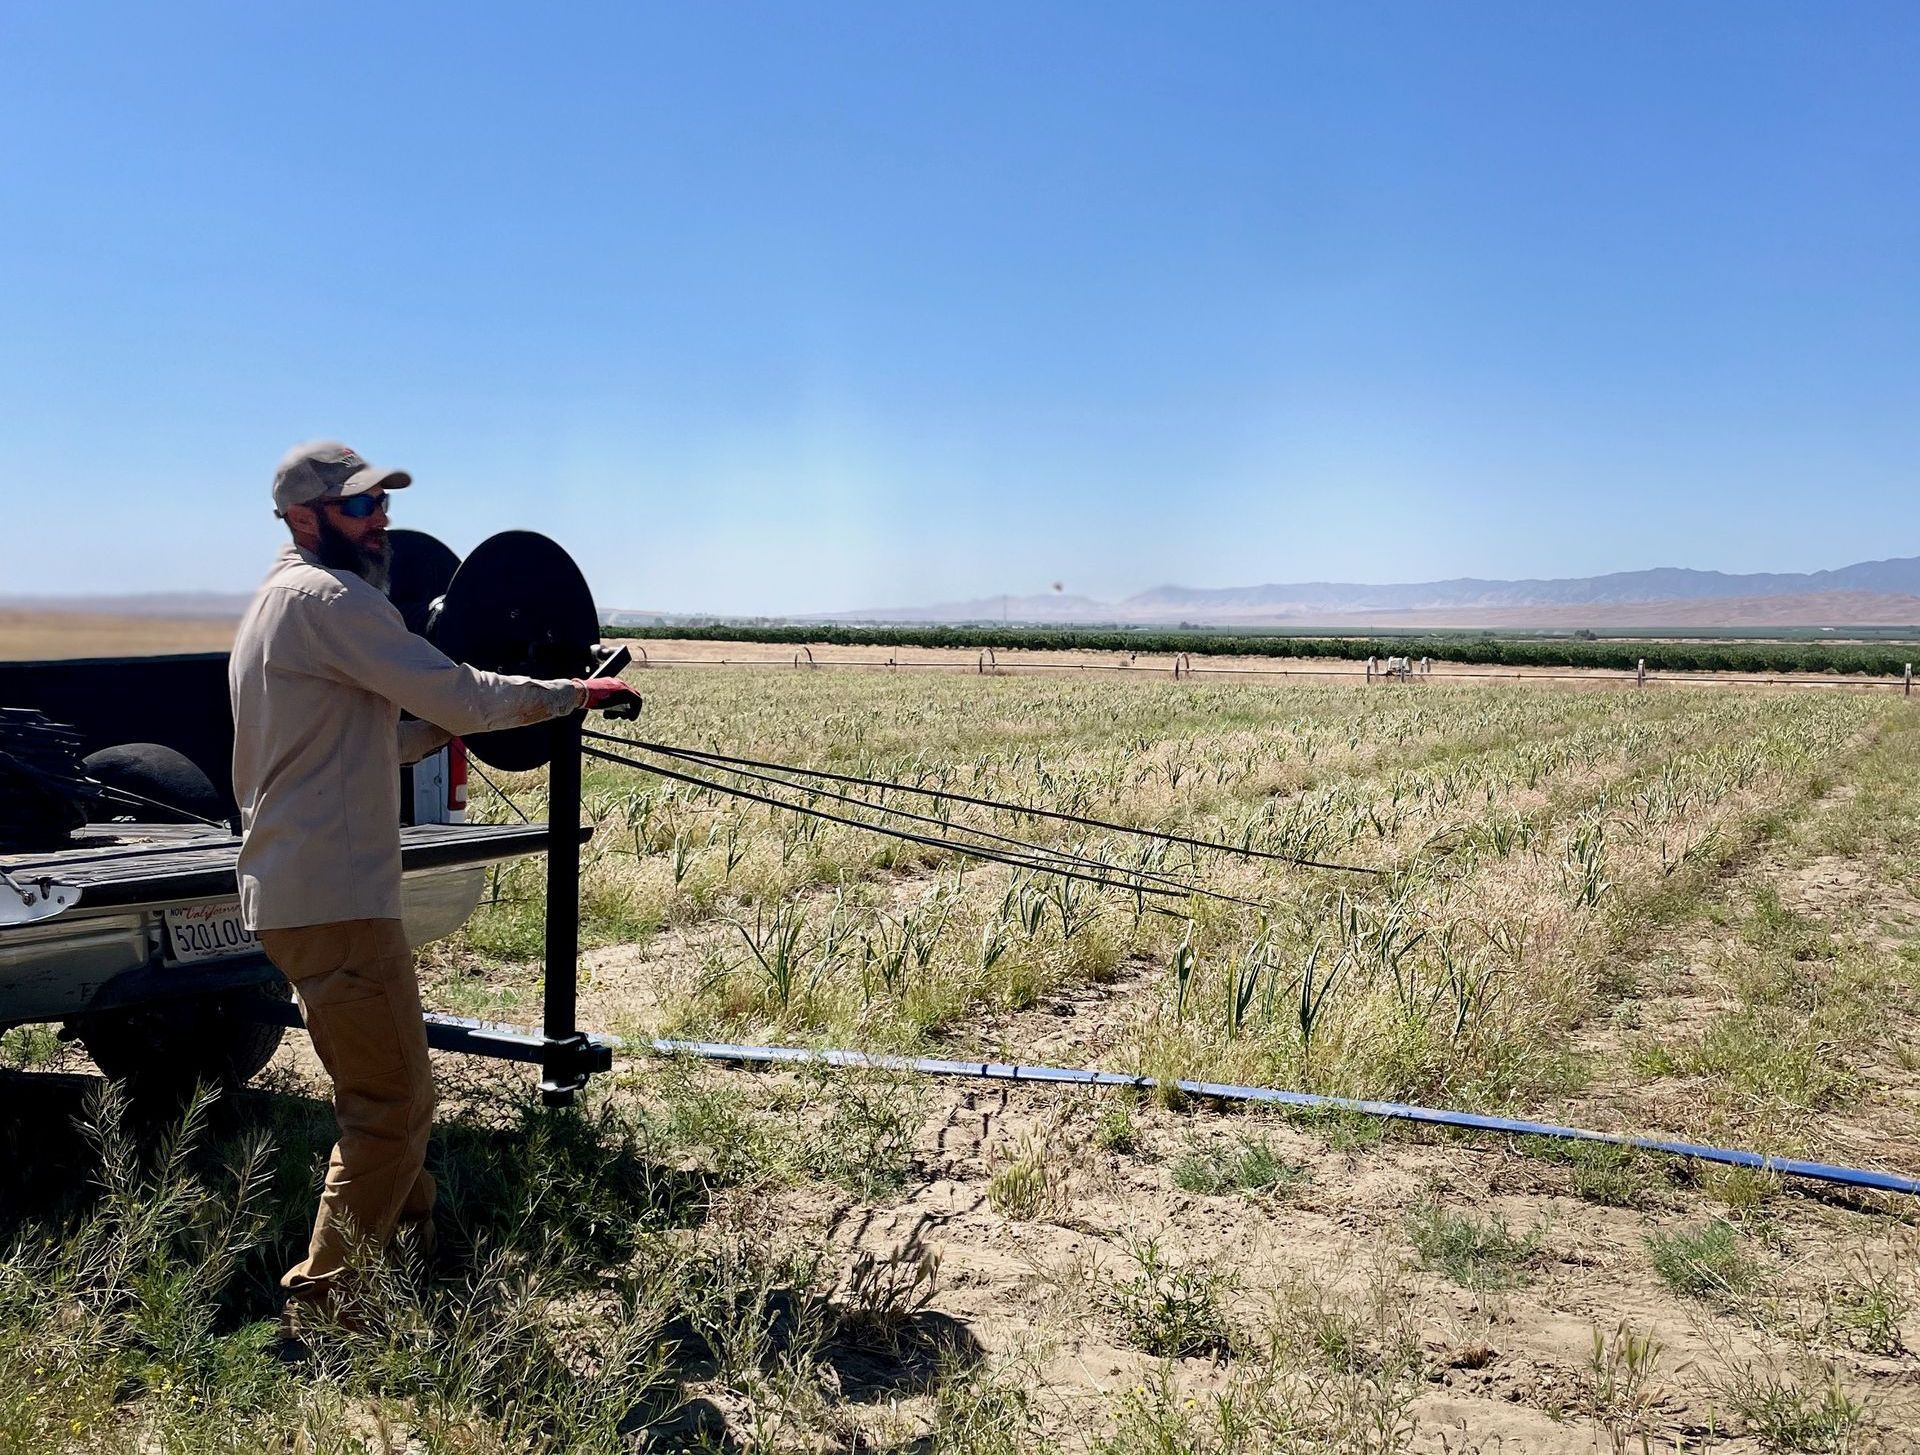
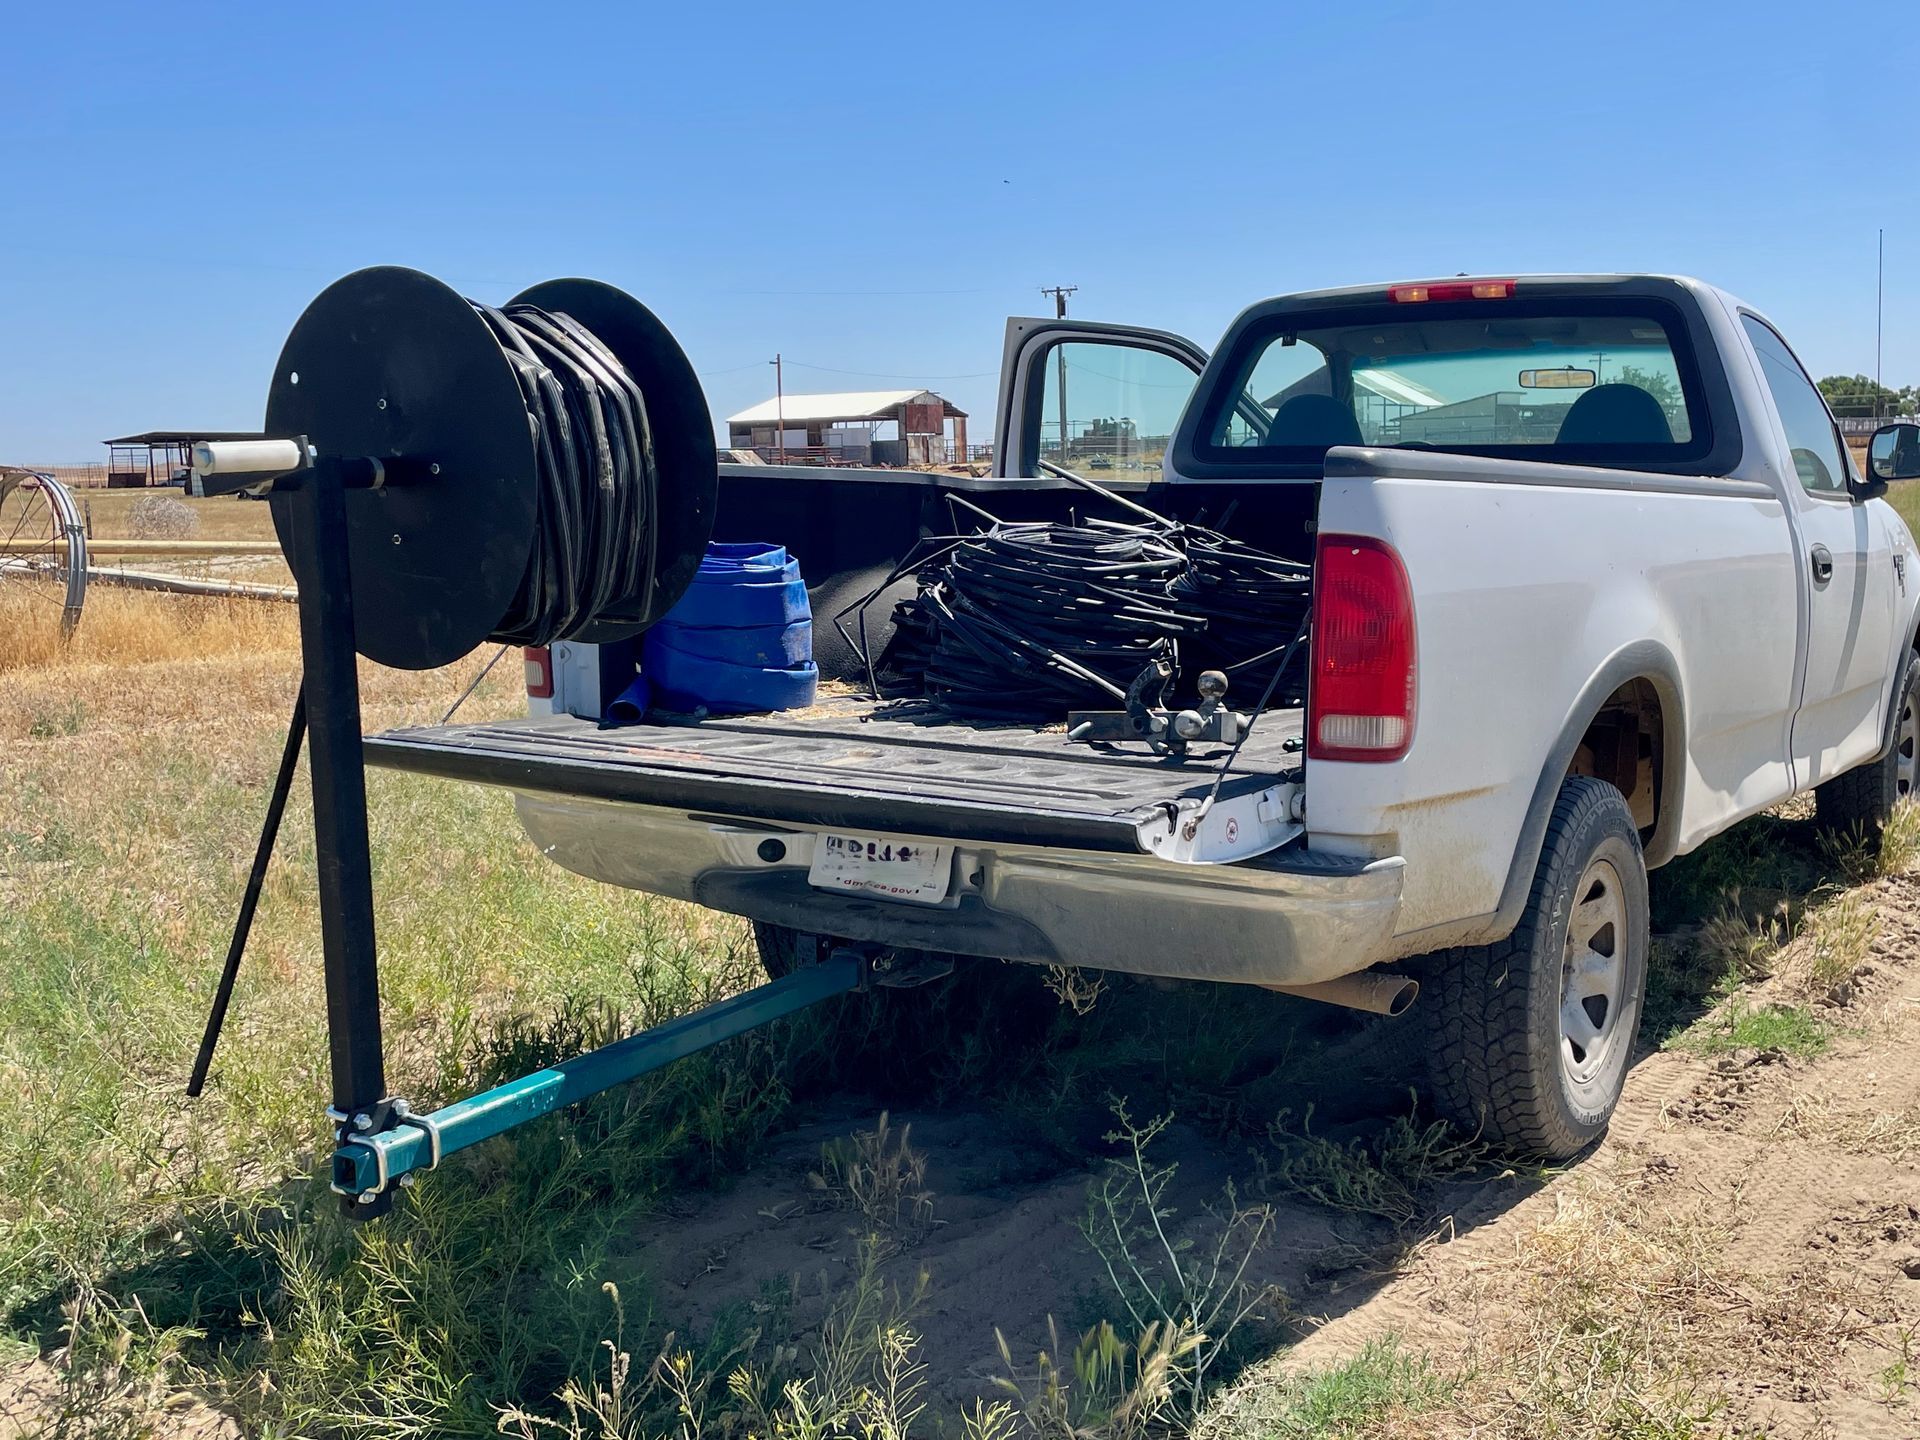
We use this cool irrigation rig to help pull up the lines. It hooks to the back of the truck and then Matt can wind them up on the spool keeping everything nice and neat.
After a week or so of drying in the ground, it's time to use the potato harvester. Yep, you heard that right, we use a potato harvester on our garlic! Part of our creativity is investigating implements that perform similar actions needed for garlic farming. The potato harvester digs under the bulbs and pulls them up onto a platform that shakes some of the dirt off.
We found that we need to make a few passes of the field that consist of using the harvester, picking up all the garlic you can find, then doing it again repetitively until all of the garlic has been picked up.


We store the bulbs in burlap sacks and lay them flat on pallets so that they get good air circulation while they cure. You can eat garlic straight out of the field, but if you want it to store properly then you need to cure it for 10-14 days.
Before the garlic is put up for the season, we do one last visual on every bulb and sorts out any imperfections.
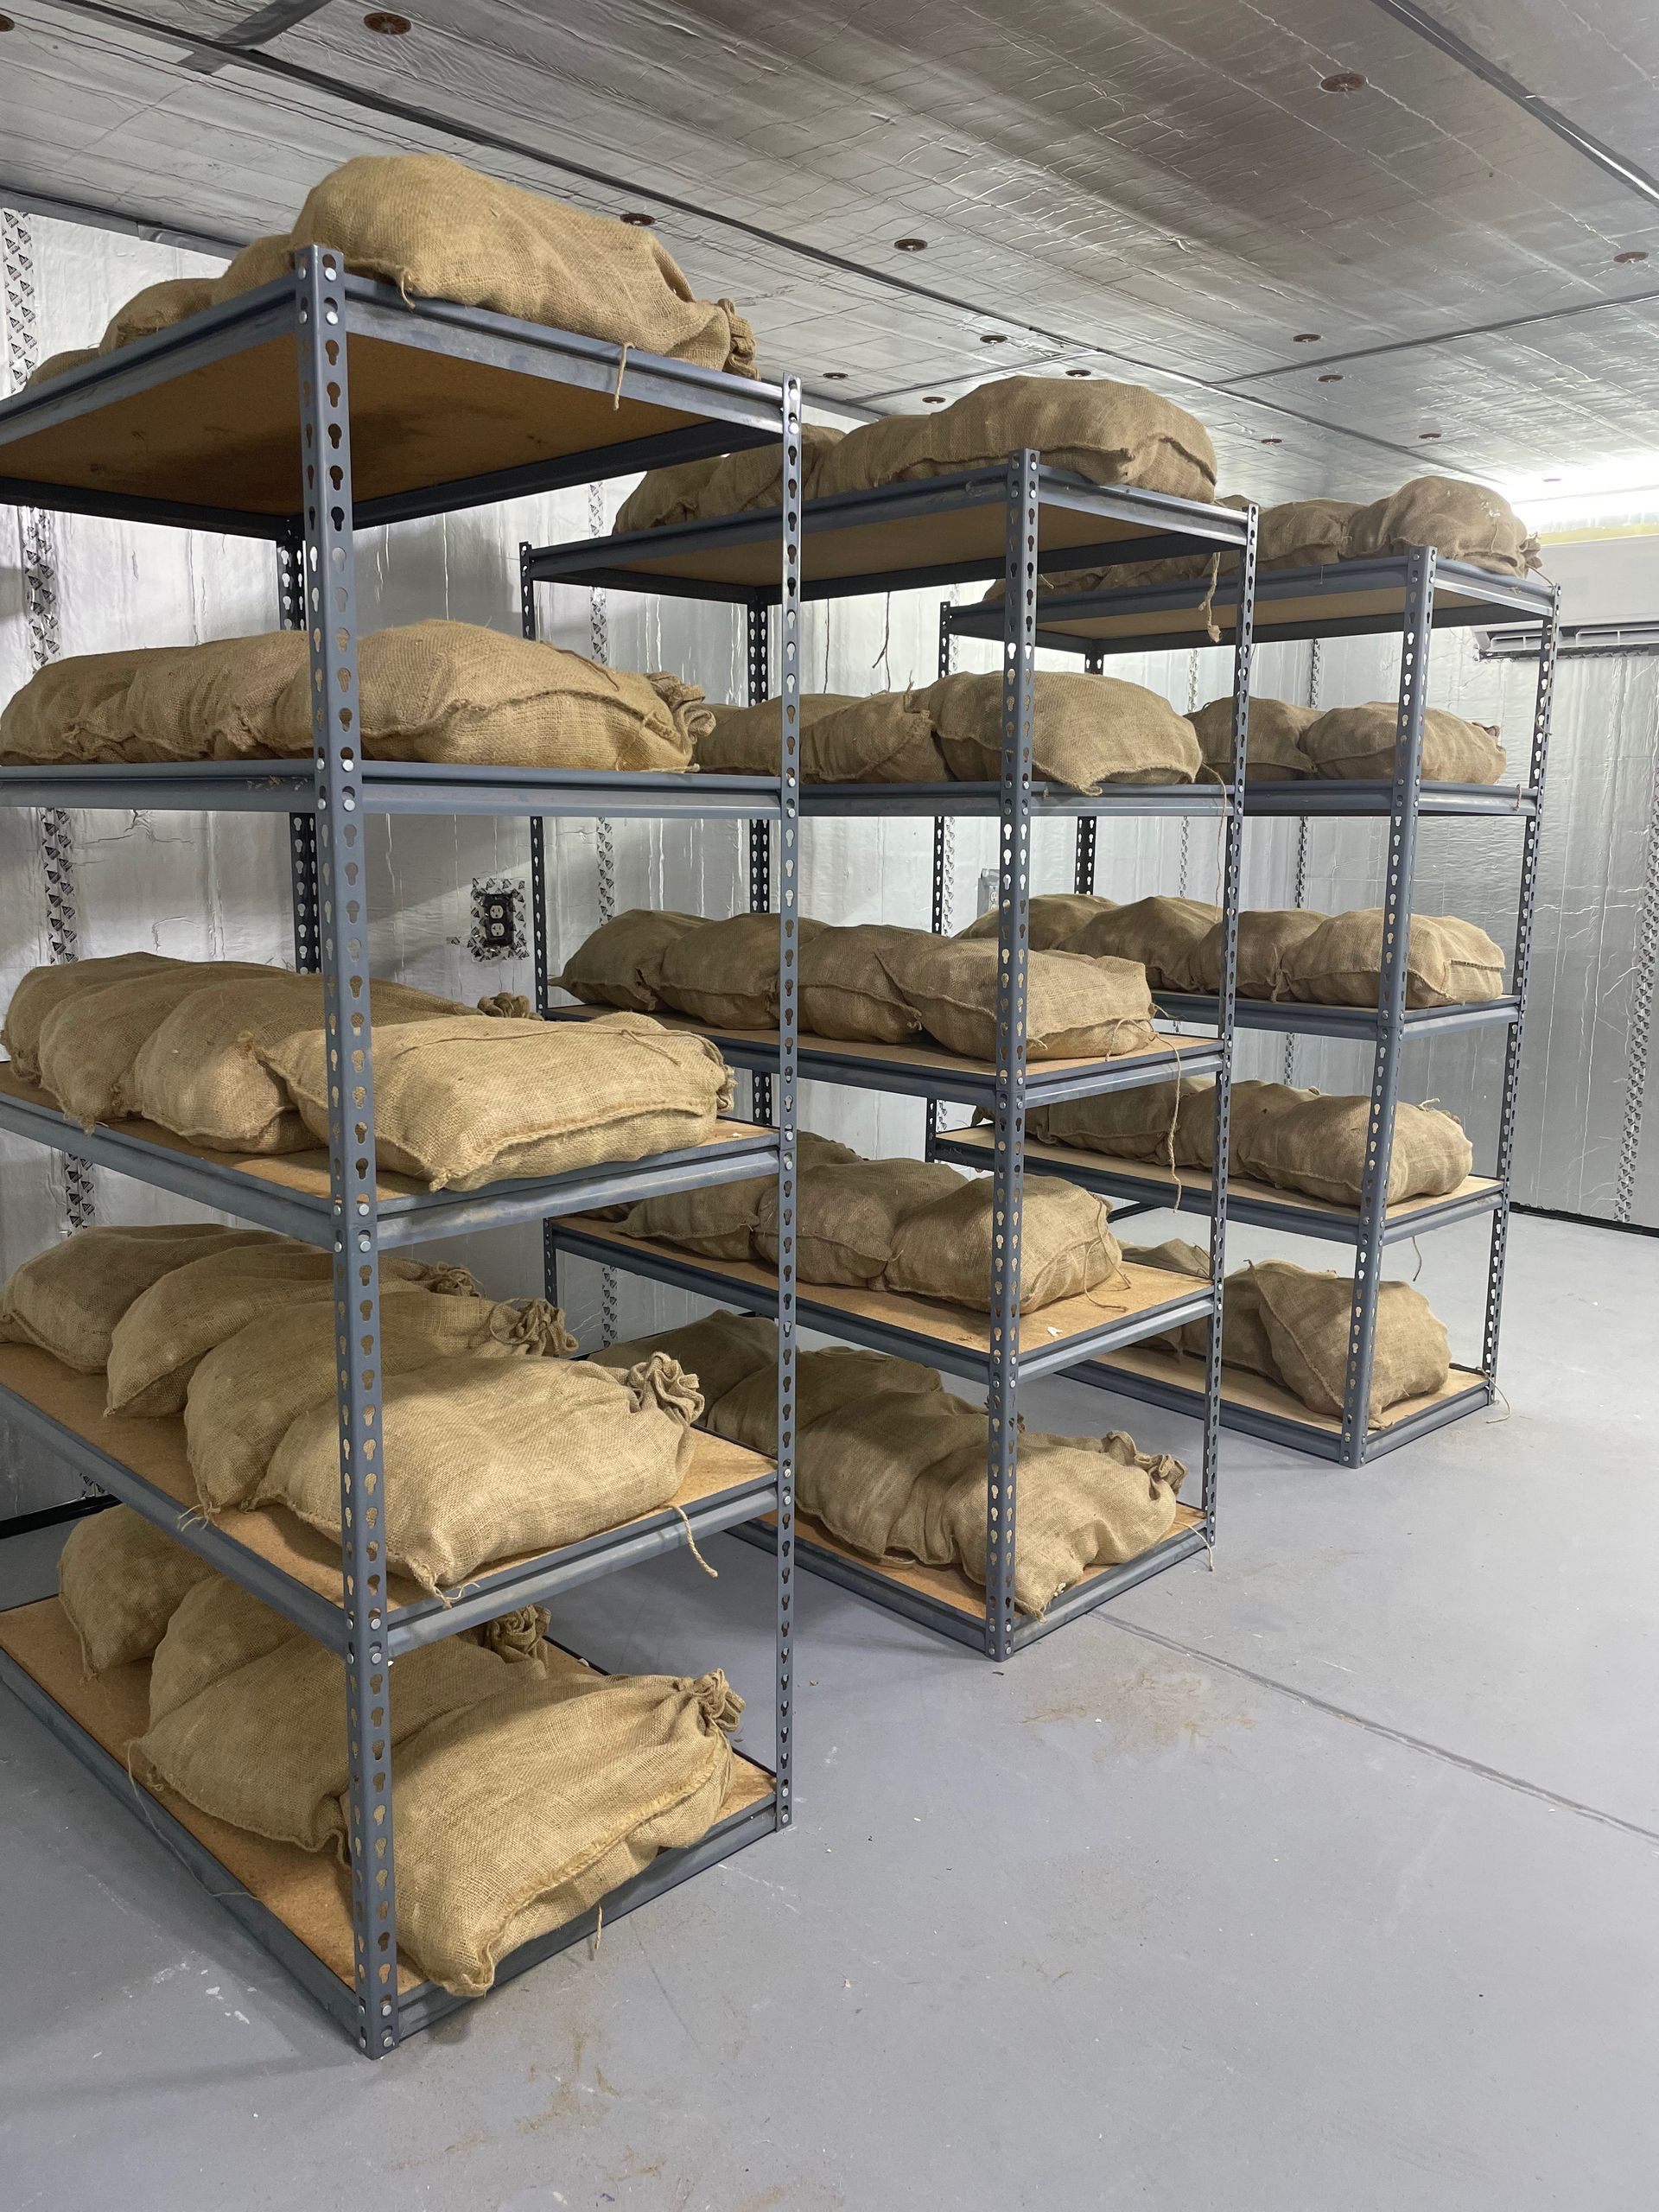
Then it's into the walk-in for storage where we keep the garlic cool and manage humidity until it's either shipped out or used as seed at the end of the year.
We love to learn and share our process. Find us on social media to keep in touch, share your experiences, ask questions and most of all buy our garlic!